Trending
Opinion: How will Project 2025 impact game developers?
The Heritage Foundation's manifesto for the possible next administration could do great harm to many, including large portions of the game development community.

Featured Blog | This community-written post highlights the best of what the game industry has to offer. Read more like it on the Game Developer Blogs or learn how to Submit Your Own Blog Post
Some tricks for making masks for dissolve effects in Far Cry 4: Shangri-La, using Modo and World Machine.

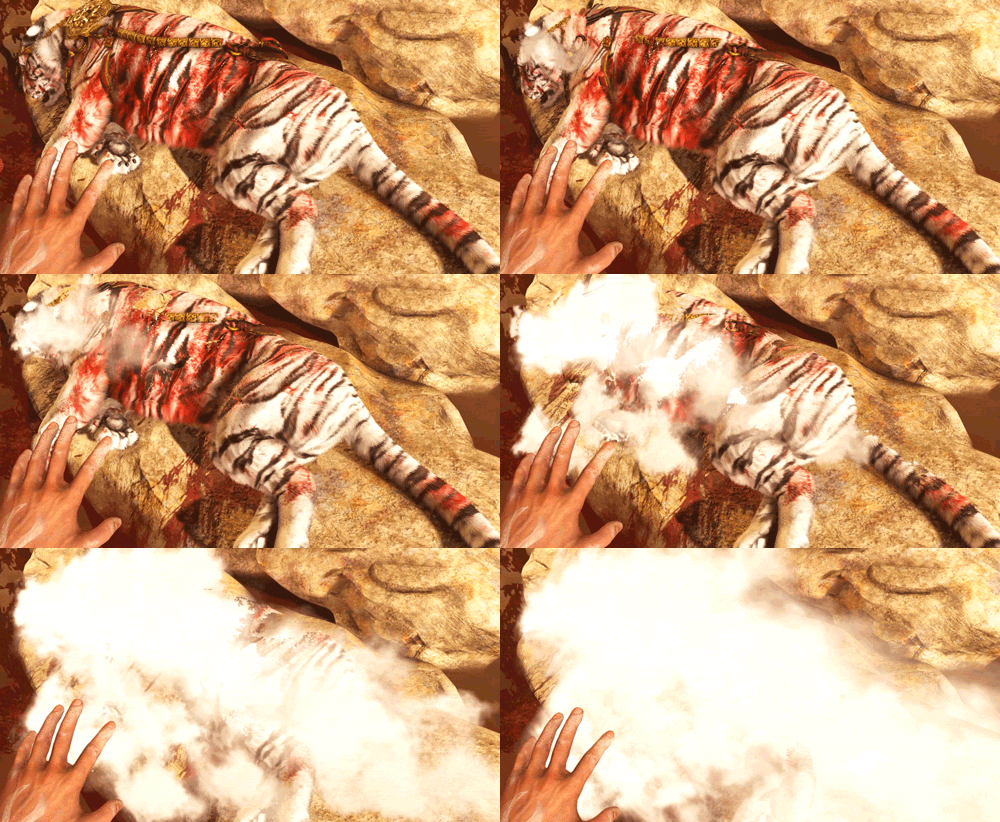
In the world of Shangri-La, Far Cry 4, lots of things crumble and dissolve into powder.
For example, my buddy Tiges here:

Or, as Max Scoville hilariously put it, the tiger turns into cocaine... NSFW I guess... That gave me a huge chuckle when I first saw it.
I was not responsible for the lovely powder effects in the game, we had a crack team (see what I did there) of Tricia Penman, Craig Alguire and John Lee for all that fancy stuff.
The VFX were such a huge part of the visuals Shangri-La, the team did an incredible job.
What I needed to work out was a decent enough way of getting the tiger body to dissolve away.
Nothing too fancy, since it happens very quickly for the most part.
I threw together a quick prototype in Unity3d using some of the included library content from Modo:

I'm just using a painted greyscale mask as the alpha, then thresholding through it (like using the Threshold adjustment layer in Photoshop, basically).
There's a falloff around the edge of the alpha, and I'm applying a scrolling tiled firey texture in that area.
I won't go into it too much, as it's a technique as old as time itself, and there are lots of great tutorials out there on how to set it up in Unity / UE4, etc.
As it turns out, there was already some poster burning tech that I could use, and it worked almost exactly the same way, so I didn't need to do the shader work in the end:
https://www.youtube.com/watch?v=Ah8_S2QBypI
I actually used World Machine to create the detail in the maps.
In the end, I needed to make about 30 greyscale maps for the dissolving effects on various assets.
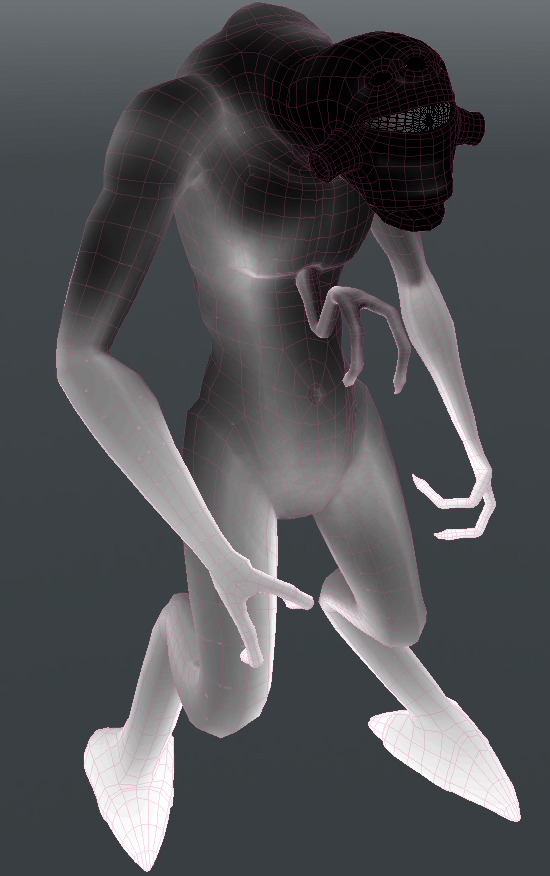
I'll use my Vortigaunt fellow as an example, since I've been slack at using him for anything else or finishing him (typical!).
First up, for most of the assets, I painted a very rough greyscale mask in Modo:

Then, I take that into World Machine, and use it as a height map.
And run erosion on it:

I then take the flow map out of World Machine, and back into Photoshop.
Overlay the flow map on top of the original rough greyscale mask, add a bit of noise to it.
With a quick setup in UE4, I have something like this:

Sure, doesn't look amazing, but for ten minutes work it is what it is :)
You could spend more time painting the mask on some of them (which I did for the more important ones), but in the end, you only see it for a few dozen frames, so many of them I left exactly how they are.
Now that I have the Houdini bug, I would probably generate the rough mask in Houdini rather than painting it.
I.e:
Set the colour for the vertices I want the fade to start at
Use a solver to spread the values out from these vertices each frame (or do it in texture space, maybe).
Give the spread some variation based off the roughness and normals of the surface (maybe).
Maybe do the "erosion" stuff in Houdini as well, since it doesn't really need to be erosion, just some arbitrary added stringy detail.
Again, though, not worth spending too much time on it for such a simple effect.
A better thing to explore would be trying to fill the interior of the objects with some sort of volumetric effect, or some such :)
(Which is usually where I'd go talk to a graphics programmer)
I ended up doing this for almost all of the characters, which exception of a few specific ones (SPOILERS), like the giant chicken that you fight.
That one, and a few others, were handled by Nils Meyer and Steve Fabok, from memory.
So aside from those, and my mate Tiges up there, here's a few other examples.

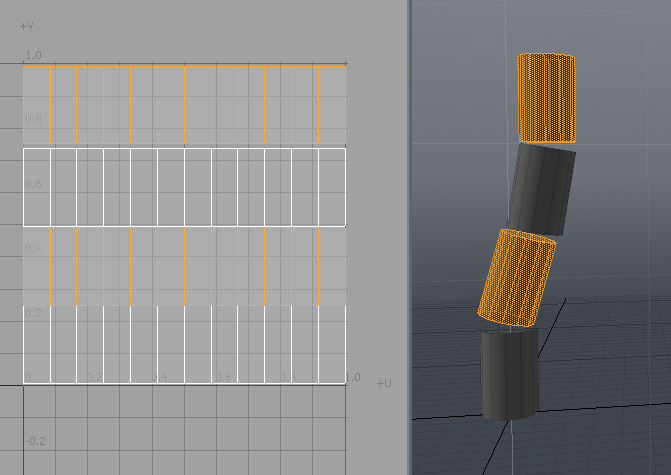
Hard to see, but the chain links fade out 1 by 1, starting from the bottom.
This was tricky, because the particular material we were using didn't support 2 UV channels, and the chain links are all mapped to the same texture space (which makes total sense).
Luckily, the material *did* support changing UV tiling for the Mask vs the other textures.
So we could stack all of the UV shells of the links on top of each other in UV space, like so:

So then the mask fades from 0 --> 1 in V.
In the material, if we had 15 links, then we need to tile V 15 times for Diffuse, Normal, Roughness, etc, leaving the mask texture tiled once.
Edwin Chan was working on the assets for these, and I could have just made him manually set that up in Max, but it would have been a bit of a pain, and I'd already asked him to do all sorts of annoying setup on the prayer wheels...
There were 3-4 different bell chain setups, and each of those had multiple LODs for each platform, so I wrote a Maxscript that would pack all the UVs into the correct range.
Quite a lot of work for such a quick effect, but originally the timing was a lot slower, so at that point it was worth it :)

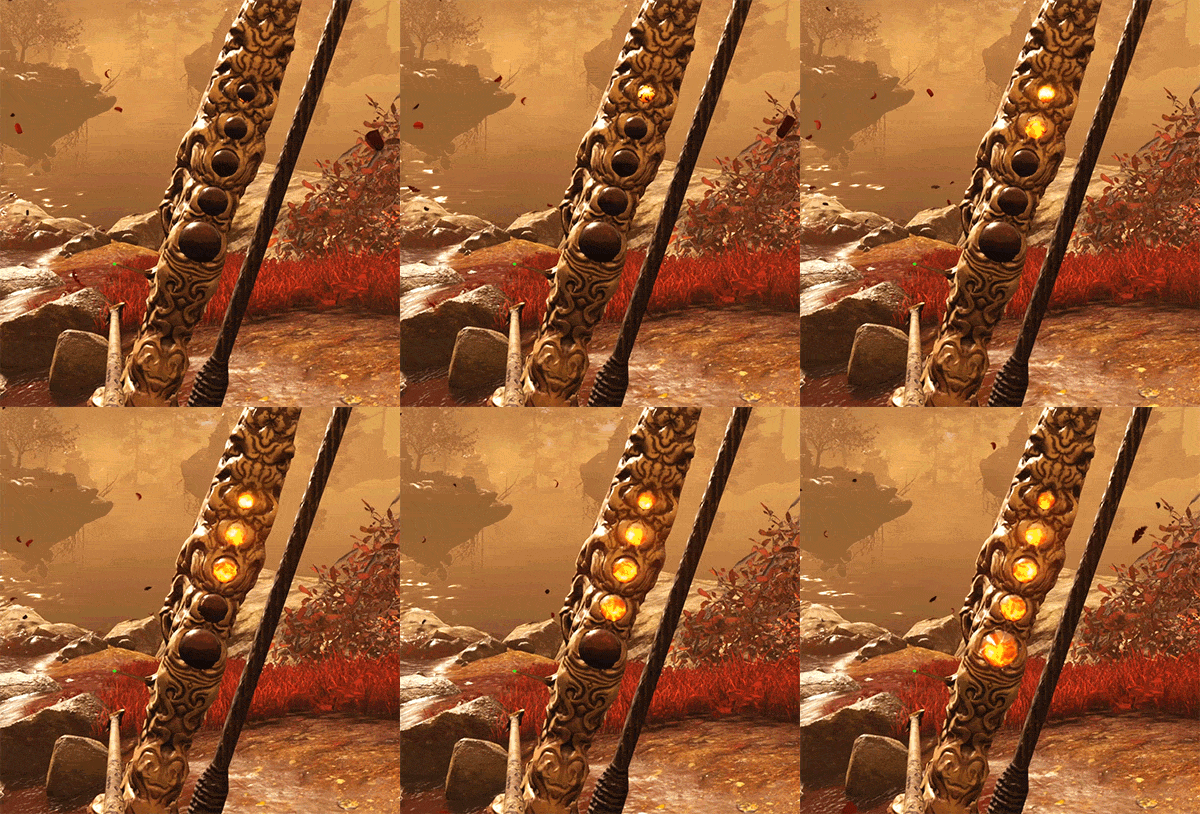
Although I never really got this as on-concept as I would have liked, I'm pretty happy with how these turned out.
Amusingly, the emissive material didn't support the alpha thresh-holding effect.
So there are two layers of mesh: the glowy one and the non-glowy one.
It's actually the non-glowy layer that fades out!
The glowy stuff is always there, slightly smaller, hidden below the surface.
Dodgy, but got the job done :P
(Re-posted from https://geofflester.wordpress.com/)
Read more about:
Featured BlogsYou May Also Like