Trending
Opinion: How will Project 2025 impact game developers?
The Heritage Foundation's manifesto for the possible next administration could do great harm to many, including large portions of the game development community.

Featured Blog | This community-written post highlights the best of what the game industry has to offer. Read more like it on the Game Developer Blogs or learn how to Submit Your Own Blog Post
I go over my pipeline for making and animating characters using Photoshop and 2Dtoolkit in Unity.


As we inch ever slowly to a closed Alpha, we’re slowly building up our social media presence. If you haven’t already, please do follow us and spread the word on Twitter and Tumblr. We’ve had a pretty good run of bi-weekly testing and for the first time last week the latest version of the game was played by people from outside the team. The results were encouraging, since both our friends Kyle and Gwen had fun playing (see Gwen's victorious pose), but there were definitely numerous things that we still have to work on.
In the meantime, let me show you my process for the creation and animation of our characters. Previously, I wrote about my decision to stick to frame by frame animation, mostly because it’s what I know best. Now I’ll go into a little bit more detail in the hopes that you guys might pick up a thing or two from it, or tell me why what I’m doing is terribly wrong. Let’s get started!

With each concept sketch I take an animal, assign its occupation, then make some sketches based on those two factors. So for example the Crow is meant to be an investigator or reporter that digs up or fabricates dirt on other candidates. I'll usually spend around 10 hours or so first looking at reference material then sketching out concepts and then coloring them in. If I had the time I would love to spend more time really doing a lot of concepts of each character but as it is I'm squeezing these in after work, which means an hour or two whenever I can find the time.

After the conceptualization is done I pick out my favorite concept animal (this is harder than it looks, and sometimes I have to ask my wife to help me choose) and render it in vector. This is important in terms of efficiency because once the animal is in rendered this way it becomes much easier to resize it and use it for multiple purposes. It's also important for me to organize it properly in different layer folders.
So let's say for example that I wanted to make a character portrait for the Investigator. I could just take the body and head part, resize it, and voila! A portrait for the Crow Investigator! It's important for small teams to always keep in mind different ways that they can make work more efficient, which is something I learned having usually worked as the sole artist for many games!

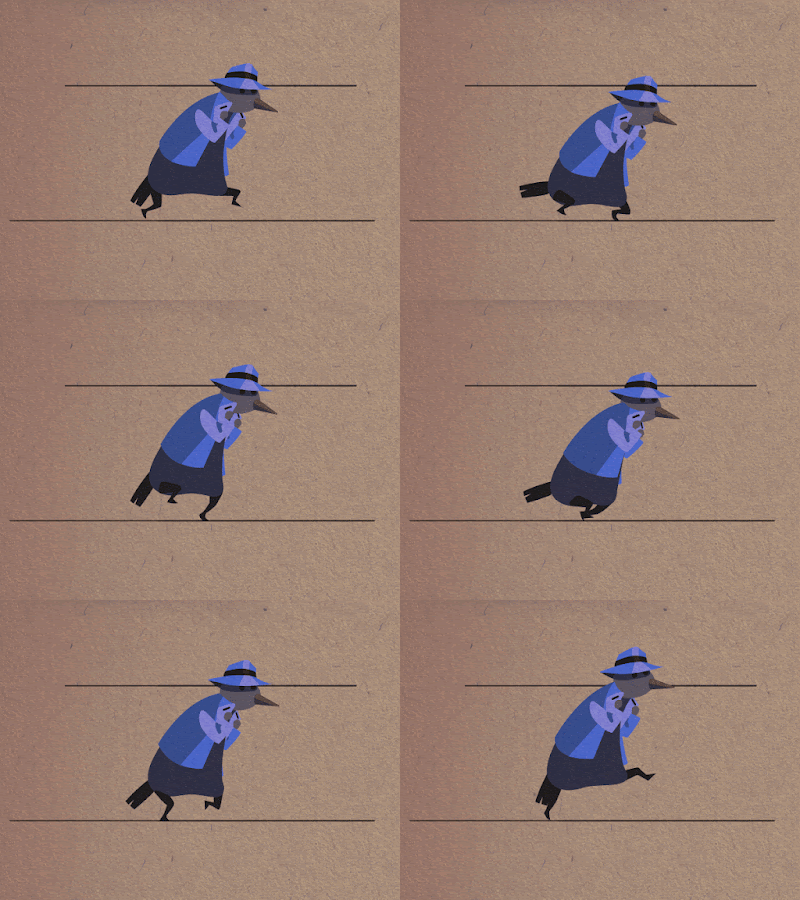
Now this is the meaty part, the animation! We have a list of animations that each character has, for example we need animations for move, bribe, etc. for this one I will show you the move animation for the Invesigator. The first step is for me to sketch out a very small animation. I sketch it small so that I don't overthink the details and just try to get a good sense of movement going. I wanted him to be all sneaky like to fit his ability to fabricate scandals.
Once that's done I take the original vectorized image and then start making frames based on the smaller animation. If I have time I will go ahead and sketch out larger frame by frame animations as well, but I usually make do with using the small animation as a reference. This is where having separated the different body parts before is really key, as I can I much more easily pick out the body parts I want to animate and move them around rather than having to look through a whole mess of vector layers.

In about 2-4 hours I will have something like this! I actually had quite a bit of trouble with this and had to refine the previous quick animation some more before I had an animation I was happy with.

This is an image showing the frame by frame animation within photoshop, so you have a better idea of how many frames I use.

Once again this is where doing everything in vector pays off, as I can easily shrink the different frames of animations, flatten them, give them an outline an then save them one by one as pngs for use in the game. We use 2dtoolkit for our animations, which I'm starting to realize may not be the best for a game with multiple animations. The file organization for 2dtoolkit seems pretty primitive, and you can easily be overwhelmed with the sheer amount of individual images. Right now we aleady use 213 sprites, and we're probably at 1/10 of the amount of animations we're planning to do.

And finally here is the Investigator in action in the game! His special ability is to fabricate a scandal, which if it's revealed in the district will do massive damage to your opponents reputation.
Thanks for reading. If you have any suggestions about how I can streamline my process without overhauling it entirely I would definitely love to hear from you! To be one of the first people to try our closed alpha, please sign up for our mailing list!
Read more about:
Featured BlogsYou May Also Like