Trending
Opinion: How will Project 2025 impact game developers?
The Heritage Foundation's manifesto for the possible next administration could do great harm to many, including large portions of the game development community.

Featured Blog | This community-written post highlights the best of what the game industry has to offer. Read more like it on the Game Developer Blogs or learn how to Submit Your Own Blog Post
Writing non-linear text games can be a challenge. Break down the writing process with this six-step framework.

This article originally appeared on dashjump.com.

Writing is hard. Writing interactive, multiple-choice games is harder.
Good at turning a phrase? Excellent – now turn seven of them, all equally-well written, that make sense in four different contexts, as said by three different characters. If nothing else, writing non-linear text game dialog and narrative is an exercise in constraints, creative reuse, and conviction.
Say you’ve got an outline for a text-based game. You know what the game’s about, who the main characters are, the major events of each chapter, what the player’s abilities are; all of the major pieces. Now it’s time to start writing – but you’re stumped. How can you write a story where anything can happen? How do you set up the player’s options? Where do you even start?
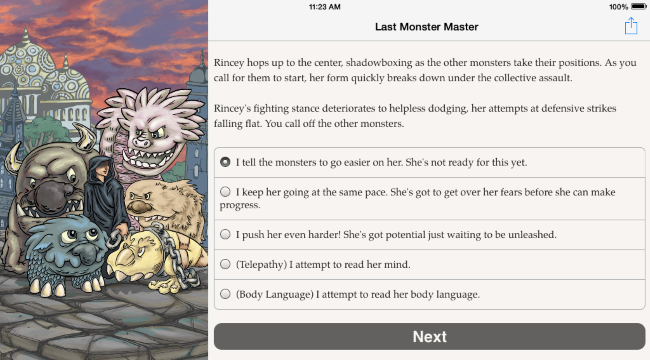
I recently released my first full-length text game for Choice of Games, titled The Last Monster Master (clocking in at 250,000(!) words), and through the process I came up with a basic framework to help write it chapter by chapter. I used the excellent (and free) Chat Mapper to write each non-linear chapter before bringing the final text into ChoiceScript, Choice of Games’ own writer-friendly scripting language.
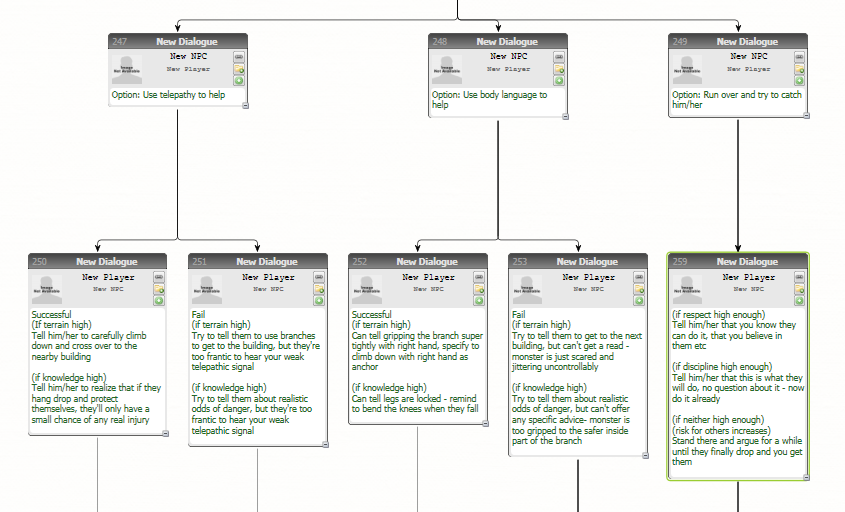
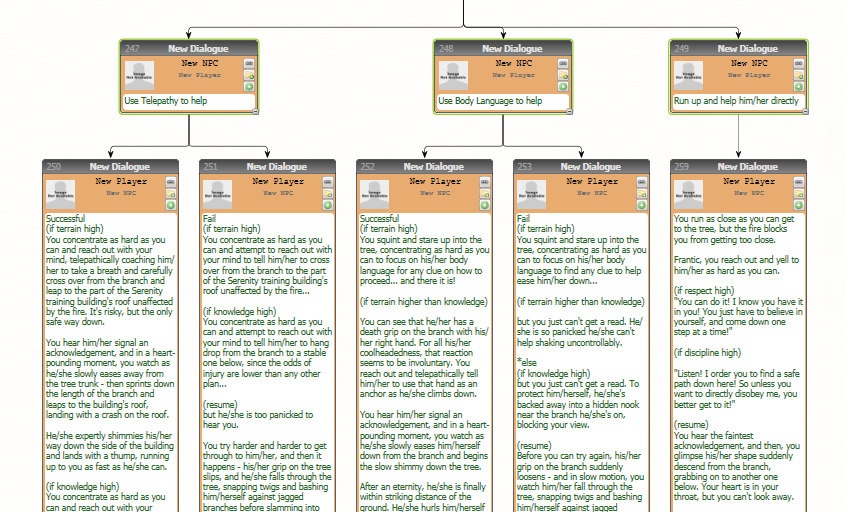
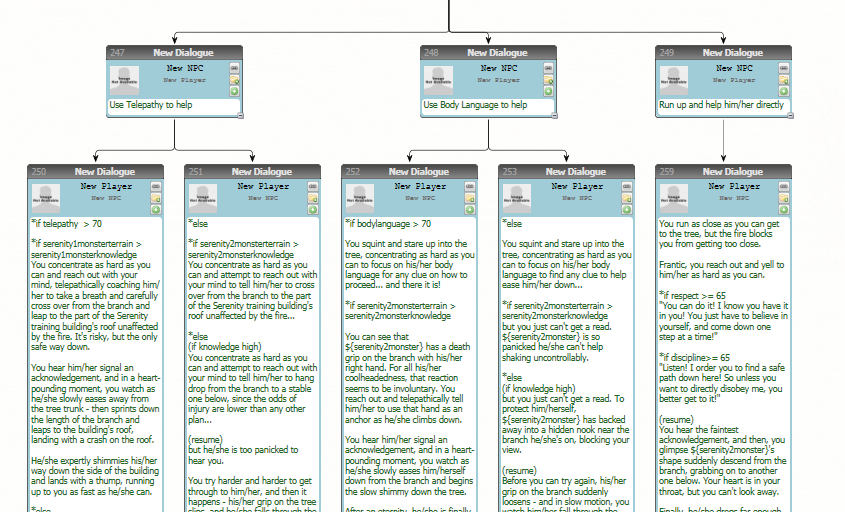
I broke the process down by taking six passes through each chapter, which helped significantly in retaining focus. What’s more, Chat Mapper has a great feature that lets you change the color of each individual text node. To help track each text pass as I worked the chapters, I used this feature to change the color of each node to mark it as finished for that pass (as in the screenshots below).
Pass 1 – Stub Text (No Color)
The first pass is all about laying down the structure for how the chapter will play out. Instead of writing any actual dialog or descriptions, use stub dialog as placeholders to indicate who will say what and when they’ll say it, and what the player’s options will be.
If there are different branches depending on stat values or other conditions, indicate the stat in question and describe the options in plain English. Don't worry about writing any game logic yet; that'll come later.
Avoid excessive revisions (or any, if you can help it) in this pass – its main purpose is to get the high-level structure of the chapter down into a readable format. When you’re done here, you’ll have a first draft of a roadmap for everything that comes next.
In the below sequence from The Last Monster Master, one of the player's monsters is stuck in a tree during an attack. The player must choose to use their Telepathy or Body Language detection skills to help the monster withstand the attack, or to run over and help directly.

Pass 2 – Stub Text Revision (Yellow)
In the next pass, focus only on revising the structure you just created. You’re looking only at the placement of things – don’t worry about misspellings or anything related to the text, since everything you've written will be replaced in revisions.
You’re primarily looking for choices or option branches that don’t make sense or are inconsistent with the story, edge cases that can lead to problems later, and dead ends that don’t link back to the main narrative flow.
Secondarily, you’re making sure that the structure so far makes use of all of the player stats or ability options you've planned to use in this chapter. If it turns out that you haven’t implemented as many as you would've liked, make a conscious decision to either amend your original plan, create new sequences or options that use these stats or make a note to utilize the forgotten stats in future chapters.
Pass 3 – First-Pass Text (Orange)
With the structure organized and refined, now it’s time to write the actual text the player will see. This is a fairly straightforward pass, but just as before, maintaining your focus is key.
Don’t worry about setting values for variables, structuring transitions, or anything else that isn’t pure writing. And just like most pure writing, this is both the most fun and the most time-intensive part.

Pass 4 – Text Revision (Purple)
Did you survive writing the actual chapter? Great! Things start to move significantly faster now. You’re about to enter editor mode.
Read through the first-pass text you just wrote with a merciless eye. Everything related to the text itself is fair game – spelling, grammar, incorrect references to characters or places, tighter word choices, etc. Again, keep your focus on the writing. Make the text sing.
Pass 5 – Variables (Blue)
The structure is nailed down and the text is looking tight. Now, go through the chapter again, looking for any instance where variables are invoked, specifically anywhere where player stats are modified or referenced in order to determine outcomes. It’s likely you’ll also have a few special cases for unique player items, one-off encounters and the like.
You’ll refine the values used here in subsequent revisions, gameplay balancing and playtesting. For now, set a baseline for where you think values need to be.
Keeping an external reference document for how much of a given stat is required per chapter or before significant events can help with consistency. For example, if the player’s Strength stat must be at least 45 for them to kick a wooden door down in Chapter 4, it’s logical to require somewhere around 65 Strength to knock down a metal door in Chapter 6 (i.e., the requisite should go up).
Doing this in a dedicated pass helps enforce good internal consistency for stat checks, which will help with across-the-board adjustments to values later.

Pass 6 – Export and Logic (Green)
Finally, you need to bring your (almost) finished chapter into the development tool you’re using to make the game itself. Fortunately, Chat Mapper exports to XML, JSON, Excel, and Rich Text formats, giving you plenty of options to work with. For The Last Monster Master, however, I simply went through each text node and copied it into my ChoiceScript file, adjusting for formatting and segment transitions as needed.
If you’re also writing the actual logic that happened behind the scenes, you’ll need to start scripting this as you bring the text into the game. Fortunately, since you’ve already resolved the questions of what needs to happen when and where, each scripting task is handily divorced from the content for pure problem solving.
Other Methods
This isn’t the only way to go about writing non-linear text games, but it worked well for this project. Depending on your style of development and the tools you're using, you could opt to export your stub text into the game early on so you can actually play through it as soon as possible. Plus, since Chat Mapper supports Lua for scripting, you could even set up all of the logic you’d need directly inside the program, as long as you don’t mind possibly scripting everything again in your actual development environment.
Whatever process you choose, stay focused on one task at a time, celebrate each milestone and take notes for things you could improve upon. Wrangling non-linear narrative is not a trivial task – so why not make a game out of it?
Ben Serviss is a game designer and producer at NYC indie developer collective Studio Mercato. Follow him on Twitter at @benserviss. |
Read more about:
Featured BlogsYou May Also Like