Trending
Opinion: How will Project 2025 impact game developers?
The Heritage Foundation's manifesto for the possible next administration could do great harm to many, including large portions of the game development community.
Most of mobile games need some scrollable lists. Unity UI provides necessary components, but putting it together is a bit tricky. I actually planned a series of post related to that topic – today we will create the most basic list.

This blog post was originally posted at http://emi.gd/blog/scroll-rect/.
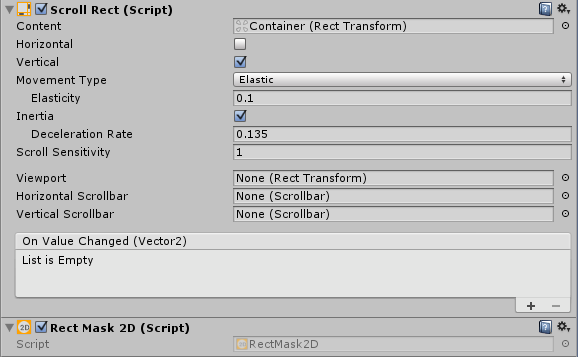
We will need two containers – the first panel will be our “window”, it will hide anything that can’t fit into its boundaries. We need to attach two components – one will be Scroll Rect – the key script that will make nice scrolling and easing the movement possible. The second one that needs to be there is Rect Mask 2D – it will hide the elements that shouldn’t be shown.

The mask doesn’t provide additional properties, but we can have some fun with the Scroll Rect. First of all, we need to attach the elements container to the Content field. We will have that created later.
I usually turn off the horizontal scrolling, because my lists can be only scrolled vertically. I also leave Elastic Movement Type, since it’s the most visually pleasing one. I leave default values on the rest of properties, but note that you can easily create a scroll bar – just place this component on the scene (you will find it in the right click context menu under UI section) and attach it to Horizontal Scrollbar or Vertical Scrollbar property. It will work magically. :)
Now we need to take care of the actual elements container. Since my lists are usually scrolled vertically, it will need the Vertical Layout Group script to nicely position its children. My children elements have fixed height, so I can also append the Content Size Fitter – that will make my container expand or shrink according to the elements count.
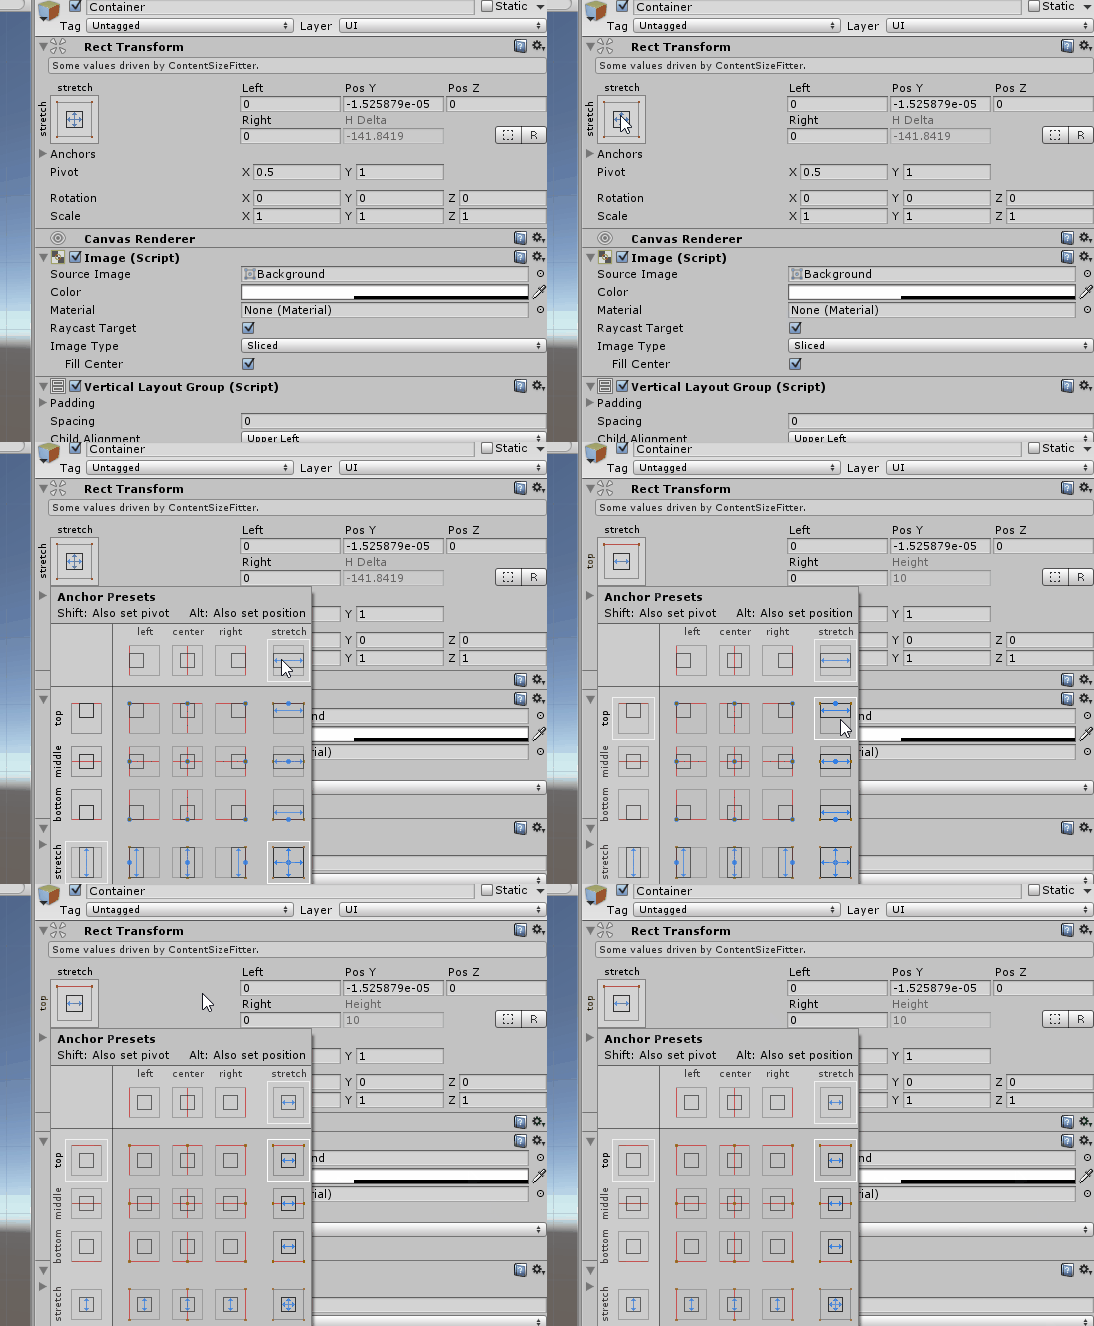
The catchy thing is we have to set Y of a Pivot property to 1 instead of 0.5 – to clamp our children to the top border. If we don’t do that, our elements will appear at the middle of the window.
I also have a tip for you – holding shift and alt will allow you to also set position and pivot in the Rect Transform window (it also changes keyboard language in my Windows):

We need it to stay at the top and stretch horizontally, so we pick up this option. Remember to attach this newly created container to the Content property in the Scroll Rect script!
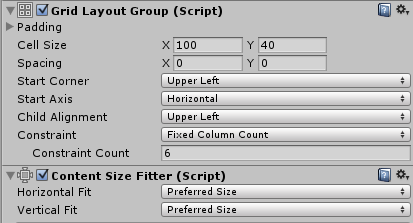
Last, but not least – the elements. I usually create a prefab that has only one special thing – it has Layout Element script attached, with the height property set - otherwise it wouldn’t be visible on the list. My Saved Rule Element is different though – it is a Grid Layout with the Content Size Fitter – so it will expand when it will have some children attached.

So finally, the game objects hierarchy will look like this:

That’s it for now – this way you can created predefined, “hardcoded” lists of elements.
Read more about:
BlogsYou May Also Like