Trending
Opinion: How will Project 2025 impact game developers?
The Heritage Foundation's manifesto for the possible next administration could do great harm to many, including large portions of the game development community.
Demons with Shotguns features a 1 - 2 player local co-op enemy wave game mode called End of Times. Let's talk about how the enemy wave controller works!

Demons with Shotguns features a 1 - 2 player local co-op game mode called End of Times, where players must fend off wave after wave of the Nephilim army in a single arena space. Demons with Shotguns is a competitive local multiplayer game first and foremost, but I always wanted to include some form of singleplayer so the game could be played alone when you didn’t have any friends around to battle it out for each others souls.
I want to share how I’ve setup the wave and enemy systems. The system makes it very easy to define waves and add new enemy types, isolating specific enemy behavior to their finite state machine states.
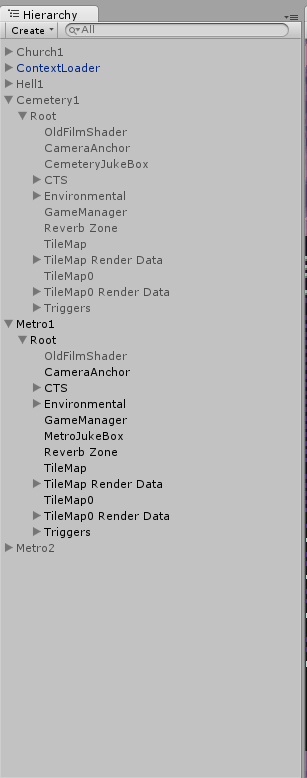
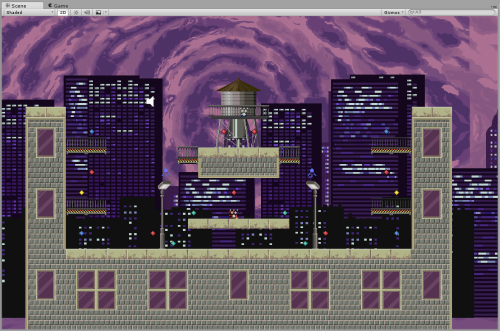
Before we dive in, let’s go over the game view. I started developing Demons with Shotguns in Unity before Unity announced their 2D API, so I’m using 2D Toolkit instead. 2D Toolkit has a built-in tile map editor that I use to build all of the game’s arenas. The End of Times game mode is isolated to a single Unity scene, with each different arena spaced out as a different tile map under a root StrangeIoC context gameobject.

The name of the root object will be used to select which wave definition file we parse (more on that later).
Each arena also has spawn points placed, both for players and enemies. A view script handles finding these spawn points and storing their reference in an array, and later passing that array to the wave controller.

The game defines which enemies to spawn in a wave, and how it controls the progression of waves. Originally, I assumed that having a system that would randomly select which enemy type to spawn at a random spawn point in the arena would suffice, but I quickly found out that to ensure the best experience, I really needed a way to define which specific enemies would spawn at which specific spawn point. It allows me to control the battle experience much more finely, ensuring a fun and diverse experience.
Currently, wave definitions are defined in simple text files. Here is an actual example for one of the Watertower Terror wave definitions.
Nomed;0|Nomed;1|Hellhound;6 |
Rocket;0,Rocket;6|Rocket;4,Rocket;5 |
Nomed;6|Rocket;1|Rocket;4|Nomed;2,Nomed;3|Hellhound;6|Rocket;0,Hellhound;2 |
Nomed;0,Nomed;5,Nomed;3,Nomed;4|Rocket;2,Rocket;3|Rocket;0,Rocket;1,Hellhound;3|Rocket;4,Nomed;3,Nomed;2,Rocket;5 |
Hellhound;3,Rocket;6,Nomed;0|Rocket;0,Rocket;6|Rocket;6,Hellhound;4,Hellhound;5|Rocket;0,Rocket;2,Hellhound;4,Hellhound;5 |
Rocket;3,Rocket;2,Rocket;0|Rocket;0,Rocket;1,Hellhound;6|Nomed;4,Nomed;5,Rocket;6,Hellhound;0|Nomed;0,Nomed;1,Nomed;2,Nomed;3,Hellhound;4,Hellhound;5,Rocket;6 |
view raw1.txt hosted with ❤ by GitHub
Each line represents an entire wave of enemies. Each cell, delimited by the pipe character, represents a cycle in the current wave, defining the enemy type and its spawn location. So looking at the first line, we see that the game starts by spawning a Nomed at spawn location 0. The pipe delimiter indicates a single cycle, so the wave controller should wait till the current Nomed is killed before spawning the next Nomed at spawn location 1, and so forth. Once all enemies in wave 1 (line 1) are killed, the controller moves on to the next line, which has two Nomed enemies spawning at the same time.
I’ll forego describing how the game parses the wave definition file as it’s not particularly interesting. Just know that based on the properties of the GameSettings object, which is created and populated in the game’s main menu system, we determine the file path of the wave definition in the game’s resource folder to parse (all done by a expected convention). Since I want to include multiple wave definitions for each arena to add more variety, I will later add the ability to randomly choose a definition file to parse, but still specific for the arena in play.
Now that we know how waves are defined, let’s look at how the controller actually operates. Once the game mode startup sequence has finished, an EnemyWaveController class will kick off, being passed an EnemyWaveModel that’s a simple POCO that wraps up the data necessary for running a wave; mainly a List of enemy spawn points and a List of Lists of Lists representing the parsed wave definition file, among other properties.
Here’s an abbreviated version of the controller class.
Our Update method runs three nested for loops (don’t panic, it’s not a performance bottleneck). Thinking back to the wave definition file, the outer for loop represents each line in the file. The first inner for loop represents a collection of enemy spawns, or the pipe delimited cells in a line, and the second inner for loop represents an individual enemy spawn.
These for loops may look ugly, but it’s very simple so let’s step through. The outer for loop will kick off, dispatch some UI feedback animations, yield for 2 seconds, and then enter another for loop to start spawning enemies in an individual cell. Once we have our EnemyType enum, we index into the spawnPoints array to determine the spawn point based on the index defined in the wave definitions file. This part requires some upfront knowledge and care, as you can easily get a IndexOutOfRangeException if the definitions file defines an index out of bounds, but we catch it and set a random spawn point if that were to ever happen.
With our EnemyType and spawnPoint, we dispatch a request to the enemy factory to actually spawn and setup the enemy. Once this has been completed for each enemy in the cell, we enter a while loop to yield every frame and check a GameStateModel property to determine if each enemy has been killed. If so, we move on to the next cell, and then eventually to the next line. This all repeats until we’ve reached the end of the definitions, and thus the player has defeated all the waves! In which, we dispatch a end game event.
So how are enemies setup and created in the enemy factory? I’m not telling till next post! Part 2 coming soon.
Read more about:
BlogsYou May Also Like