Trending
Opinion: How will Project 2025 impact game developers?
The Heritage Foundation's manifesto for the possible next administration could do great harm to many, including large portions of the game development community.
In this post, I explore the creation of a simple system for path editing and animation in the Unity editor. Topics covered include interpolation methods, speed control on curves, and a brief intro to working with custom Unity Editors.

Note: This post was originally published on our studio's development blog. We're a small student team based in Ontario, Canada working on our first commercial project.
Choosing Unity for our team's development needs has been, by and large, a great experience and a valuable learning opportunity. Along the way, we're learning that the ability to extend the engine's functionality is essential to make the most of working with Unity.
Today, I’ll be focusing on path animation, something we used quite extensively to create animations in our original C++ prototype from a couple of years ago. Since we were stuck without an existing engine as a starting point, we built a basic level editor for our original custom engine (the OG engine, as we dubbed it). The editor had several features built in for creating and transforming objects in a level, with a few sub-editors for object properties - path animation, collision, and in-game properties.
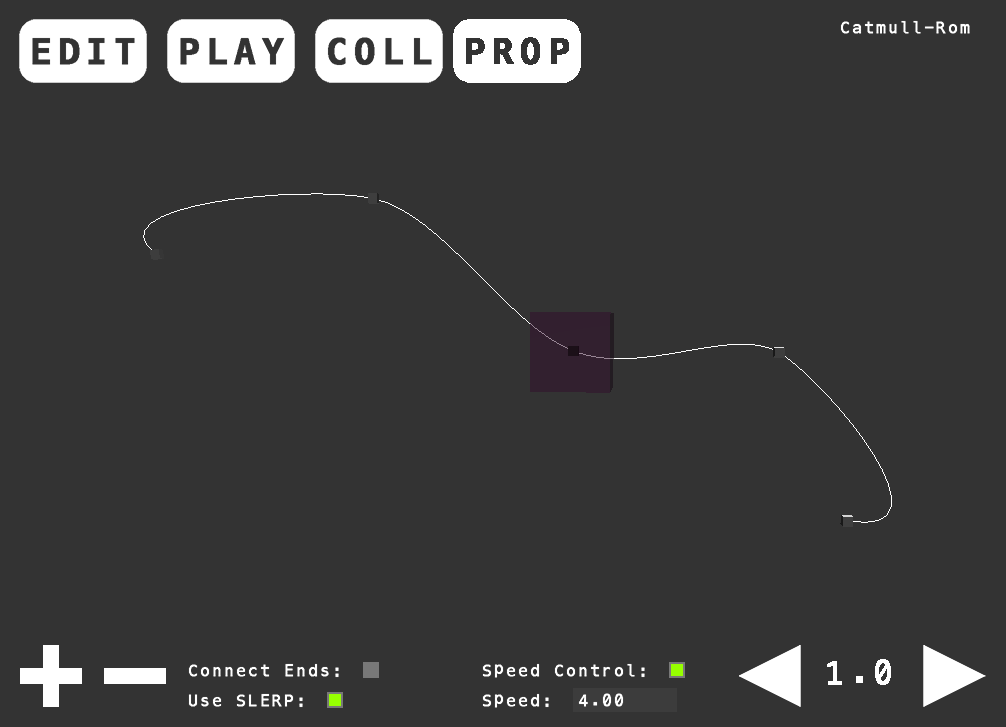
If we’re being honest, our original path animation editor started as nothing more than a homework requirement, though it became eminently more useful as the year went on - particularly for particle effects, as we could use it to create breadcrumb trails and little flourishes of light and sparks that brought life to even the dustiest corners of the game.
In making the switch to Unity, we had initially [naively] assumed that Unity would have a more polished inbuilt path animation system. Much to our chagrin, despite its myriad of useful features, Unity has no such system out-of-the-box. You can achieve basic linear animations using the animation editor, or use navmesh-based traversal for AI characters, but the vanilla editor is somewhat lacking in the way of path animation. So, if we want to animate our particle systems, or camera, or anything, along a spline that we can visualize in the scene, we need to develop our own system.
Our system will require a few key features to constitute a working prototype:
A waypoint system that can smoothly animate objects along a curve at runtime.
Support for different types of interpolation.
A custom editor that lets us add, remove, and edit waypoints and/or control handles.
A way of visualizing our path in the scene view so that we can preview and edit it more easily.
I’m going to start by tackling #2, as an understanding of interpolation forms the fundamental basis of any path animation system. Interpolation experts can feel free to skip ahead, and those completely unfamiliar with the topic should definitely look into some further personal research - a firm grasp on the concepts of different kinds of interpolation is immensely helpful in a surprising number of applications.
The basic concept of interpolation is this - you have a number of waypoints, and an equation for defining a curve based on those waypoints. Anything you animate along that curve runs off of a timer - that timer (well, a normalized version of it) is used as input, along with some of your waypoints, to an equation that spits out a point in space representative of your object’s position on the curve at the current moment in time. And that’s it. The equation that you choose defines how your curve will look - a series of lines, a smooth curve, a fancy Illustrator-style Bézier curve, and so forth.
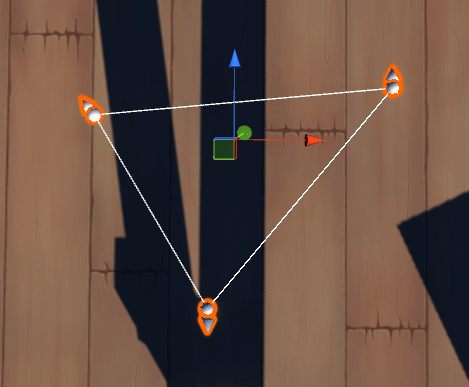
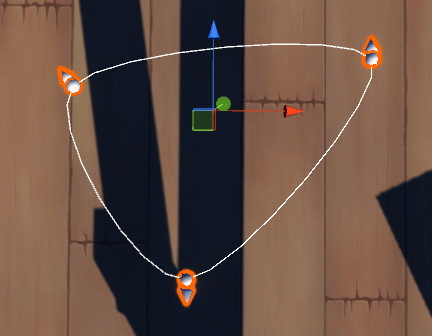
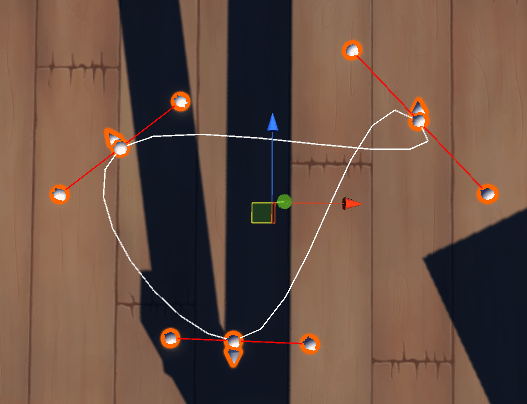
For our path editor, we’ve chosen to support basic linear interpolation, Catmull-Rom interpolation, and cubic Bézier interpolation. Here’s what each of those looks like in a very basic nutshell - I won’t go into the reasoning behind the math here, though you can and should read the mathematics behind each one of these methods.
(Note that the t in each case is the object’s timer for the current frame/waypoint divided by the total time for that segment of the path - something that you can define manually, or with speed control, discussed below.)
Linear Interpolation (LERP):
public static Vector3 Lerp(Vector3 p0, Vector3 p1, float t)
{
    return (1.0f - t) * p0 + t * p1;
}
Catmull-Rom:
public static Vector3 Catmull(Vector3 p0, Vector3 p1, Vector3 p2, Vector3 p3, float t)
{
    return ((p1 * 2.0f)
        + (-p0 + p2) * t
        + ((p0 * 2.0f) - (p1 * 5.0f) + (p2 * 4.0f) - p3) * (t * t)
        + (-1 * p0 + (p1 * 3.0f) - (p2 * 3.0f) + p3) * (t * t * t)) * 0.5f;
}
Bézier:
public static Vector3 Bezier(Vector3 p0, Vector3 p1, Vector3 p2, Vector3 p3, float t)
{
    return (1.0f - t) * (1.0f - t) * (1.0f - t) * p0
        + 3.0f * (1.0f - t) * (1.0f - t) * t * p1
        + 3.0f * (1.0f - t) * t * t * p2
        + t * t * t * p3;
}
(For this implementation of Bézier, points p1 and p2 are actually the handles on the curve, which essentially define tangents that can shape smooth or sharp corners, or create loops, as I've done above.)
Note that each of these curves uses waypoints that are more or less in the exact same positions - so the interpolation method you choose is instrumental in determining how the final animation will look.
To define your object’s motion along the path, you have a couple of options; you can manually define the time taken for each curve segment - which requires a lot of tweaking and causes inconsistent speeds along tight curves, or you can implement a technique called speed control. Speed control lets you define your object’s desired movement speed and uses a table of curve samples to create smooth, consistent motion. The process goes something like this:
Resample each segment of the curve using your interpolation method of choice, calculating a number of subsamples in between (8 is a nice number for this, 16 if you want extra precision or have particularly long curves).
As you resample, use the distance between samples to calculate the approximate cumulative path length.
Calculate the time taken to traverse the entire curve based on your object’s speed and the total length of the curve.
As you animate the object, use the object’s timer to measure its traversal along the entire curve, using the timer to track its place in the table of samples and using LERP to move the object between all subsamples.
Using these concepts, it’s fairly obvious how you might build a simple system for storing a path and animating objects along that path - keep a list of Transforms pointing to your waypoints in the scene, use their positions for interpolation and/or subsampling, and adjust your object’s trajectory in the Update function.
The real magic here is in creating a custom editor for your paths, so that you can switch between interpolation methods, add and remove waypoints, push them around, and watch as your path changes in the scene. Here’s an example of what we’re shooting for (excuse GIF quality):
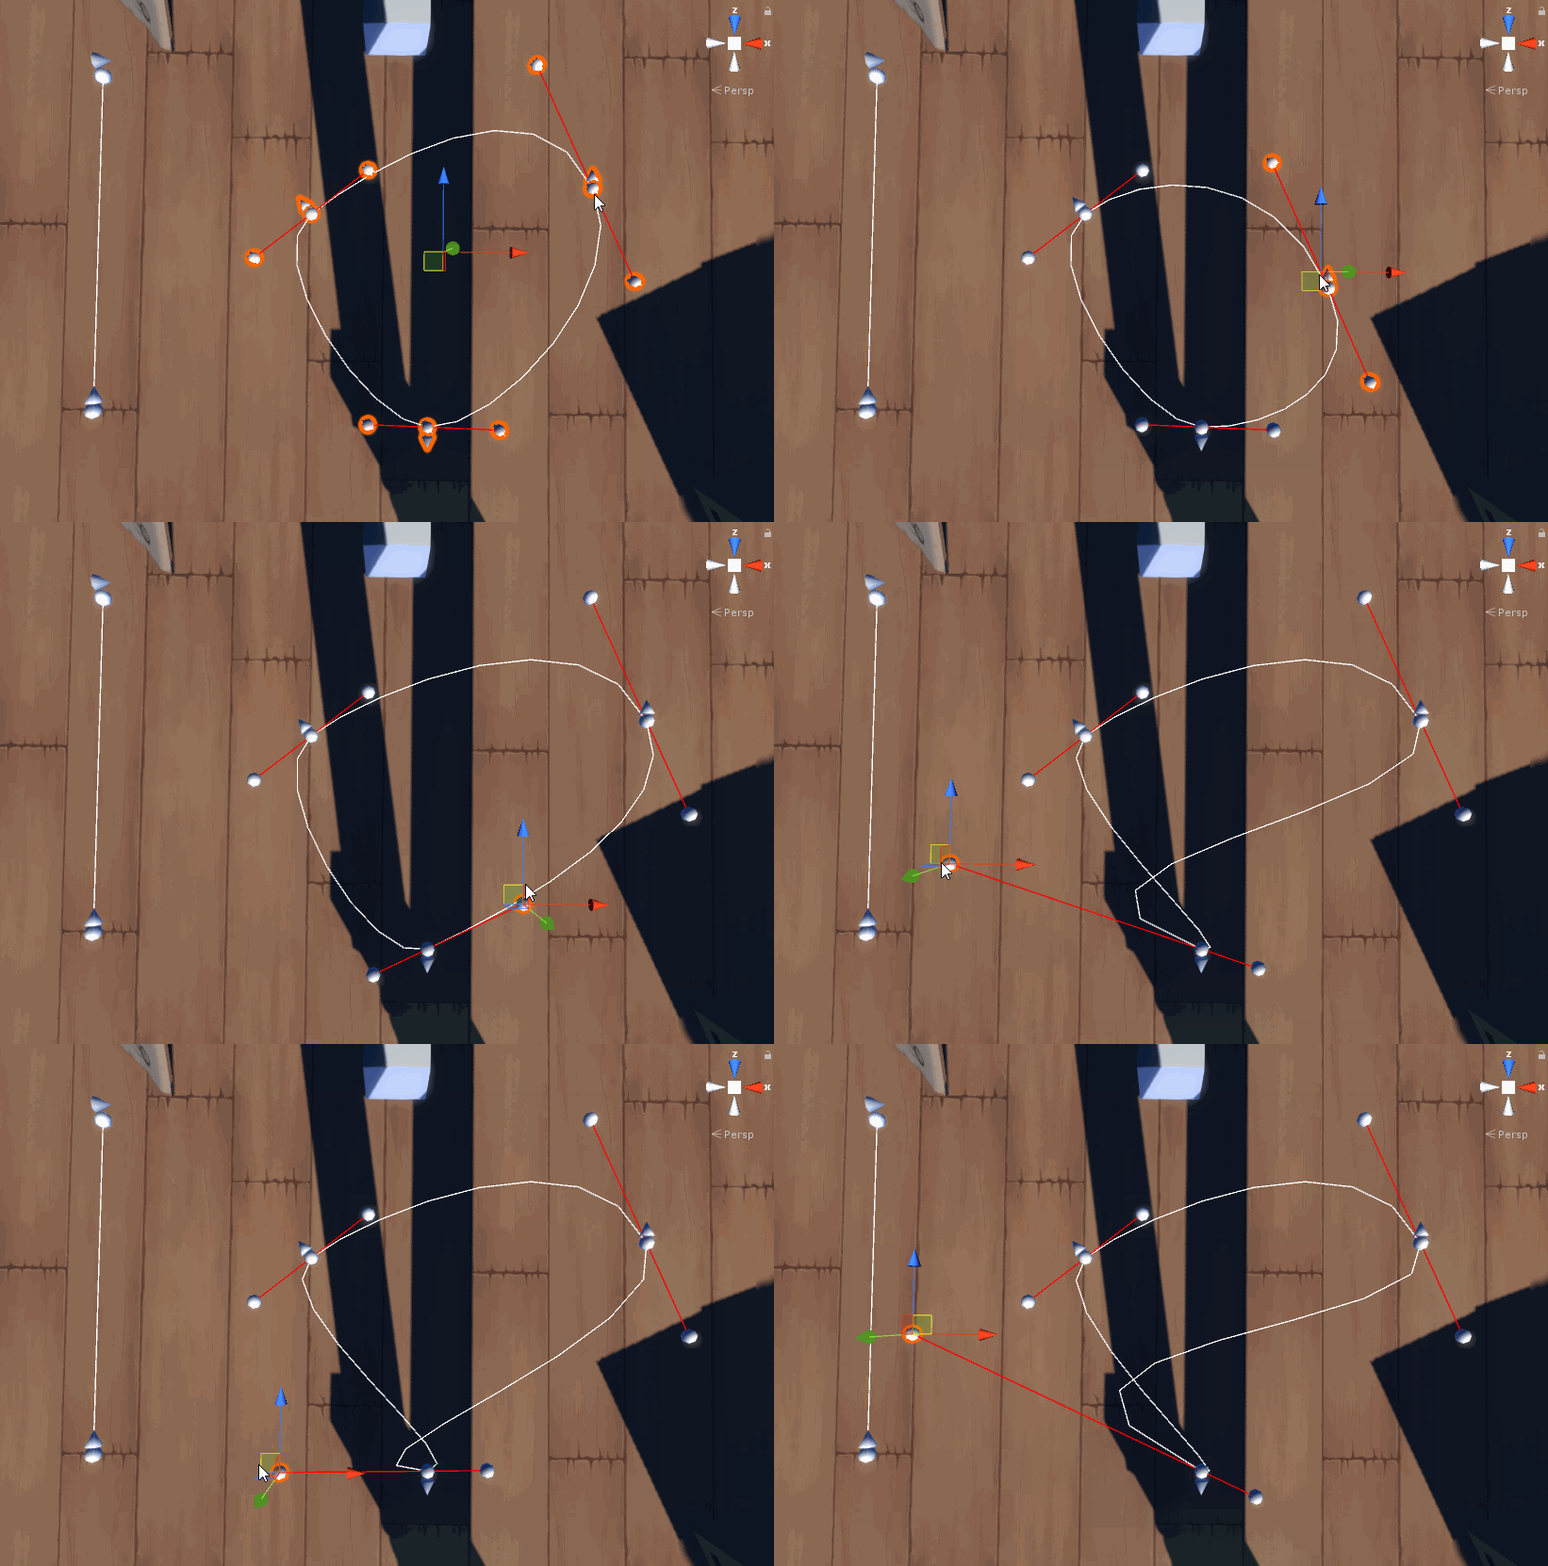
To achieve this, we’ll want to append the [ExecuteInEditMode] tag to our main path script for the purposes of gizmo drawing, and create a basic Editor script with a custom layout for adding/removing waypoints and setting them up automatically on our curve. Check out Unity’s documentation on the Editor utility, GUILayout, and SerializedProperties for a quick rundown, and make sure to tag your Editor script with [CustomEditor(typeof(YourClass))] To display custom property fields, we’ll need to grab a handle to the serialized version of our object:
private void OnEnable()
{
    //The 'target' variable is built-in to the Editor class.
    //Cast it according to the class type for which you're building your Editor.
    path = (OGPath)target;
    serial = new SerializedObject(path);

    waypoints = serial.FindProperty("waypoints");
    lockTangents = serial.FindProperty("lockTangents");
    visualizeColor = serial.FindProperty("visualizeColor");
    showLoop = serial.FindProperty("showLoop");
}
From here, we can grab properties using the FindProperty function, and display those using PropertyFields in OnInspectorGUI - just remember to call Update on your serialized object at the beginning of the routine, and ApplyModifiedProperties at the end, lest you be baffled by checkboxes that refuse to change. Here’s an example of how that looks:
public override void OnInspectorGUI()
{
    serial.Update();

    //Insert PropertyFields, Layout functions, buttons, etc.
    //Check out the documentation for some examples of what you can do.
    //Here's a snippet of what we used for our purposes:

    EditorGUILayout.PropertyField(visualizeColor);
    EditorGUILayout.PropertyField(showLoop);

    GUILayout.Label(string.Format("Interpolation: {0}", path.pathMode.ToString()));

    EditorGUILayout.PropertyField(lockTangents);

    if (GUILayout.Button("Set to Linear..."))
        path.SetInterpolationMode(OGPath.PathMode.Linear)
    //...And so on for your other Inspector functionality...

    serial.ApplyModifiedProperties();
}
Getting the curve to display in the editor was far easier than I had anticipated - simply implement the OnDrawGizmos function in your main path script, and use the DrawLine function to plot your curve along your waypoints (in the case of LERP) or your subsample table (if you’re using Catmull, Bézier, or some other more complex method). Bézier can be a bit tricky due to the fact that some waypoints are actually “handles” - I got around any potential confusion for our level designers by keeping the handles in a separate list, so that swapping between different interpolation methods would keep a more consistent general trajectory. Regardless of how you choose to handle different curves (sorry), though, a custom editor is key, and not all that difficult to set up. The resulting prototype functions something like this:
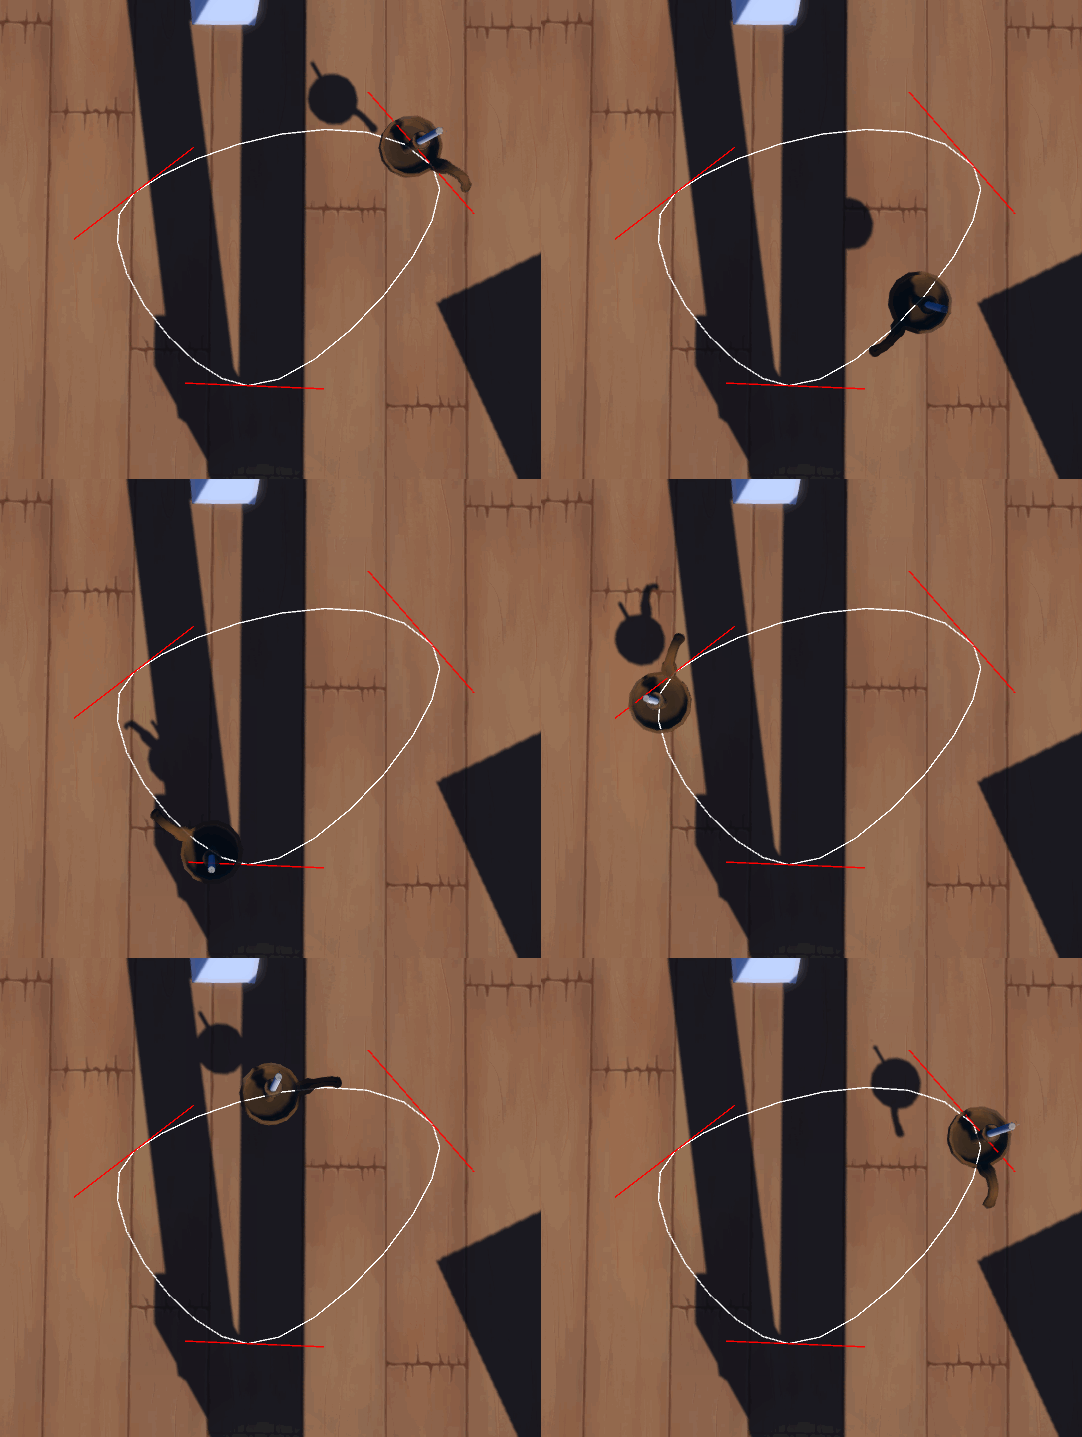
In the couple of weeks since developing our initial prototype, we've extended it to support features like transitioning between curves, modes of object rotation, and a basic cutscene system built on chaining and timing multiple paths together.
In the next couple of weeks, I'll be posting an update on working more in-depth with Unity's systems for implementing custom editors, property drawers, and so on. Until then, it’s back to the grindstone! Thanks for reading.
Feel free to reach out in the comments if you have any questions or you'd like to add to the discussion!
Read more about:
BlogsYou May Also Like